Contents
- 1 Introduction
- 2 Understanding Your Carpet
- 3 Regular Maintenance: The Key to Carpet Longevity
- 4 Deep Cleaning Your Carpet
- 5 Step-by-Step Guide to Cleaning Your Carpet
- 6 Tips for Maintaining a Clean Carpet
- 7 Conclusion
Introduction
Keeping your home’s carpets clean is not just about maintaining their appearance; it’s also essential for the health and hygiene of your living space. Carpets can harbor dust, allergens, and stains, which can affect air quality and overall cleanliness. This guide will provide you with simple, effective methods to clean carpets at home using readily available tools and products.
Keywords: clean carpet at home, home cleaning, carpet maintenance, DIY carpet cleaning, stain removal, dust and allergen reduction, eco-friendly cleaning solutions
Understanding Your Carpet
Types of Carpets and Their Care
Carpet types vary widely, and understanding the specific needs of your carpet material is essential for effective cleaning and long-term care. Let’s delve into three common types: wool, synthetic fibers, and blends.
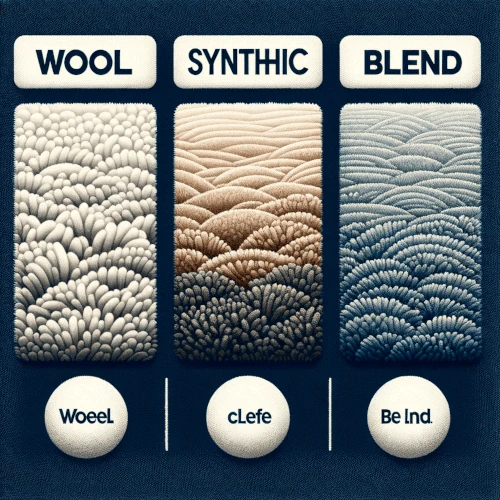
Wool Carpets
- Characteristics: Wool carpets are prized for their natural fibers, softness, and durability. They are naturally stain-resistant and can last for decades with proper care.
- Cleaning and Maintenance: Wool carpets should be vacuumed regularly with a suction-only vacuum cleaner to avoid damaging the fibers. When dealing with spills, blot immediately with a clean, white cloth. Avoid using high-alkaline cleaning solutions; instead, opt for neutral pH cleaners. Excessive water can damage wool carpets, so use minimal moisture and ensure thorough drying.
Synthetic Fiber Carpets
- Characteristics: Synthetic carpets, typically made from nylon, polyester, or polypropylene, are known for their stain resistance, affordability, and versatility.
- Cleaning and Maintenance: These carpets can tolerate a bit more water than wool, making them suitable for steam cleaning. Regular vacuuming is important to remove dirt and prevent matting. Most household carpet cleaners work well on synthetic fibers. However, always check the manufacturer’s recommendations before using any cleaning product.
Blended Carpets
- Characteristics: Blended carpets often combine the qualities of natural and synthetic fibers, offering a balance of durability, comfort, and cost-effectiveness.
- Cleaning and Maintenance: The care for blended fiber carpets depends on the specific blend ratio. If wool is a significant component, treat it like a wool carpet, especially concerning moisture exposure and heat. For blends that are primarily synthetic, standard carpet cleaning methods are typically safe. Always vacuum regularly and address spills promptly to prevent stains.
Additional Tips for All Carpet Types:
- Spot Testing: Before applying any cleaning solution, always conduct a spot test in an inconspicuous area to ensure there’s no discoloration or damage.
- Professional Cleaning: Consider professional cleaning every 12 to 18 months, especially for high-traffic areas and delicate materials like wool.
- Avoiding Harsh Chemicals: Steer clear of harsh chemicals, especially on natural fibers like wool, as they can degrade the fibers and cause fading.
Keywords: wool carpet care, synthetic fiber maintenance, blended carpet cleaning, vacuuming, spot testing, professional carpet cleaning, natural and synthetic blend
Understanding the specific needs of your carpet type is crucial for effective cleaning and preserving its quality and appearance over time. By tailoring your cleaning methods to the type of carpet in your home, you can ensure a clean, healthy, and aesthetically pleasing environment.
Identifying Common Carpet Issues
Understanding common carpet issues is crucial for effective maintenance and extending the life of your carpets. Let’s explore these issues in more detail, along with care tips and solutions.
Stains
- Types: Stains can range from food and drink spills to ink, oil, and pet accidents.
- Care Tips: The key to dealing with stains is promptness. Blot spills immediately to prevent the stain from setting. Use a clean, absorbent cloth and work from the edges to the center. For tougher stains, use a carpet-specific cleaner or a DIY solution suitable for your carpet type. Avoid scrubbing harshly, as this can damage the carpet fibers.
Dust Accumulation
- Impact: Dust can easily accumulate in carpets, potentially triggering allergies and reducing air quality.
- Care Tips: Regular vacuuming is essential to remove dust. For deeper cleaning, use a carpet cleaner with a HEPA filter. If possible, ventilate the area well during and after vacuuming. Consider using a humidifier in dry conditions to reduce static, which can attract more dust.
Wear and Tear
- Causes: High foot traffic, furniture pressure, and improper cleaning techniques can lead to wear and tear.
- Care Tips: Rotate your furniture periodically to distribute wear evenly. Use area rugs or runners in high-traffic zones. When vacuuming, adjust the height setting of your vacuum cleaner to suit your carpet’s pile height, and avoid using the beater bar on delicate carpets.
Odor
- Sources: Odors can originate from food spills, pet accidents, moisture, or lack of ventilation.
- Care Tips: Regular cleaning is essential to prevent odors. For persistent smells, sprinkle baking soda on the carpet, let it sit for several hours or overnight, then vacuum it up. Ensure the carpet is completely dry after any wet cleaning process to prevent mold and mildew, which can cause odors.
Additional Maintenance Tips
- Immediate Attention to Spills: Clean spills immediately to prevent them from becoming stains. Blot, don’t rub, and use appropriate cleaners.
- Routine Deep Cleaning: Besides regular vacuuming, deep clean your carpets at least once a year. This can be done using a rented carpet cleaner or by hiring professional services, especially for sensitive materials like wool.
- Sunlight Protection: Protect carpets from prolonged sunlight exposure, which can cause fading. Use curtains or blinds in brightly lit rooms.
- Avoiding Certain Products: Be cautious about using harsh chemicals, especially on natural fiber carpets. Some products may be too abrasive or can leave residue behind.
By understanding and addressing these common carpet issues, you can significantly extend the life and appearance of your carpets. Regular maintenance, combined with prompt and appropriate care for stains, dust, wear, and odors, will keep your carpets looking and smelling fresh for years to come.
Regular Maintenance: The Key to Carpet Longevity
Vacuuming: Your First Line of Defense
Regular vacuuming is crucial in maintaining your carpet. It removes surface dirt and prevents the embedding of dust and debris into the carpet fibers.
Spot Cleaning Spills and Stains
Promptly treating spills and stains can prevent them from becoming permanent. Techniques vary depending on the type of stain and carpet material.
Keywords: regular maintenance, vacuuming, spot cleaning, stain prevention
Deep Cleaning Your Carpet
DIY Cleaning Solutions
Creating your own carpet cleaning solutions can be an effective and economical way to tackle various stains. Here’s a list of DIY solutions, their uses, and application methods for different types of stains.
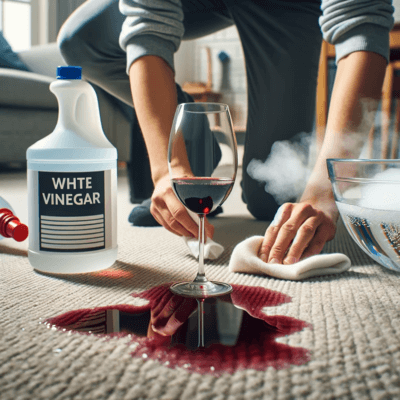
1. Vinegar Solution
- Ingredients: 1 part white vinegar, 1 part water
- Uses: Effective for a variety of stains including pet stains, coffee, and light discolorations.
- Application: Mix the ingredients in a spray bottle. Spray onto the stain, let it sit for a few minutes, then blot with a clean cloth. Rinse with water and blot dry.
2. Baking Soda and Vinegar
- Ingredients: Baking soda, white vinegar
- Uses: Great for removing odors and lifting greasy stains.
- Application: Sprinkle baking soda on the stain first, then spray with a vinegar and water mixture. Let the solution fizz and sit for five to ten minutes. Blot with a cloth, rinse with water, and dry.
3. Ammonia Solution

- Ingredients: 1 tablespoon clear ammonia, ½ cup warm water
- Uses: Effective for heavy-duty stains like wine or blood.
- Application: Mix ammonia with water. Apply to the stain using a sponge or cloth. Blot the stain gently, then rinse with water and blot dry. Use in a well-ventilated area and avoid using on wool carpets.
4. Dish Soap Solution

- Ingredients: ¼ teaspoon mild dish soap, 1 cup warm water
- Uses: Ideal for most common stains, especially those that are not oil-based.
- Application: Mix the dish soap and water. Apply the solution to the stain with a cloth. Blot the stain, then rinse with water and dry.
5. Hydrogen Peroxide Solution
- Ingredients: Hydrogen peroxide (3% solution), water (optional for dilution)
- Uses: Good for stubborn stains, including blood and wine.
- Application: Apply hydrogen peroxide directly to the stain. Let it sit for a while, then blot the area. Rinse with water and dry. Test for colorfastness as hydrogen peroxide can bleach some fabrics.
6. Salt Solution

- Ingredients: Salt, cold water
- Uses: Effective for red wine or grease stains.
- Application: If it’s a red wine stain, pour some white wine or cold water over the stain and then sprinkle salt on it. Let it sit for about 10 minutes. Vacuum up the salt, then clean the area with a mixture of vinegar and water.
7. Club Soda

- Ingredients: Club soda
- Uses: Good for coffee and wine stains.
- Application: Blot the stain first, then apply club soda. The carbonation and salts in club soda help lift the stain. Blot again, rinse with water, and dry.
Tips for Using DIY Cleaning Solutions
- Always Blot, Don’t Rub: Blotting absorbs the stain, while rubbing can spread it and embed it deeper into the carpet fibers.
- Test First: Before using any solution, conduct a spot test in an inconspicuous area to ensure it won’t discolor your carpet.
- Use Sparingly: Don’t oversaturate the carpet with cleaning solutions. More isn’t always better.
- Proper Ventilation: Some solutions, like those containing ammonia, should be used in well-ventilated areas.
- Patience: Some stains may require a second or third treatment for complete removal.
These DIY solutions offer a versatile and cost-effective approach to dealing with a variety of carpet stains. By understanding the properties and best uses of each, you can effectively maintain your carpet and tackle stains as they occur.
The Deep Cleaning Process
Deep cleaning involves more than just surface treatment. It’s about addressing the deeper layers of your carpet to remove embedded dirt and allergens.
Keywords: deep cleaning, DIY solutions, eco-friendly products
Step-by-Step Guide to Cleaning Your Carpet
Step 1: Preparing the Area
Clear the area of furniture and other items. Pre-treat any visible stains.
Step 2: Vacuuming
Thoroughly vacuum the carpet to remove loose dirt and debris.
Step 3: Choosing Your Cleaning Method
When it comes to deep cleaning carpets at home, there are three primary methods you can consider: steam cleaning, dry cleaning, and using a carpet shampooer. Each method has its specific processes and benefits, making them suitable for different types of carpets and levels of soiling.
Steam Cleaning (Hot Water Extraction)
- Process: Steam cleaning involves using a machine that sprays a hot water and detergent solution onto the carpet and then immediately vacuums it up along with the dislodged dirt and grime. This method is highly effective at removing deep-seated dirt and sanitizing carpets.
- DIY Approach: Rent or purchase a steam cleaner. Pre-treat any stains on the carpet. Fill the machine with hot water and a suitable carpet cleaning solution. Start from the far corner of the room and work backward to avoid stepping on cleaned areas. After cleaning, allow the carpet to dry completely, which may take several hours.
- Best For: Deep cleaning and heavily soiled carpets.
Dry Cleaning (Absorbent Compound)
- Process: Dry cleaning involves sprinkling an absorbent compound over the carpet. This compound absorbs dirt and debris. After a specific set time, vacuum up the compound.
- DIY Approach: Purchase a dry carpet cleaning compound. Vacuum the carpet thoroughly. Sprinkle the cleaning compound evenly over the carpet and use a brush to gently work it into the fibers. Leave it for the recommended time, then vacuum thoroughly to remove the compound.
- Best For: Carpets that cannot handle moisture well and quicker cleaning times.
Carpet Shampooing
- Process: Carpet shampooing uses a foamy chemical distributed by a carpet shampooer. The machine then brushes the shampoo into the carpet and vacuums out the dirt that’s been lifted.
- DIY Approach: Rent or buy a carpet shampooer. Vacuum the carpet first. Fill the machine with water and carpet shampoo. Move the shampooer over the carpet in a similar manner to a regular vacuum. Let the carpet dry thoroughly after shampooing.
- Best For: General cleaning and refreshing of carpets.
Tips for DIY Carpet Cleaning Methods
- Preparation: No matter the method, always start by vacuuming the carpet to remove surface dirt and debris.
- Stain Pre-treatment: Tackle stains before the general cleaning process. Use a suitable stain remover based on the carpet material.
- Testing: If you’re using a new cleaning product, always perform a spot test in a hidden area to check for colorfastness.
- Ventilation: Proper ventilation is crucial, especially for steam cleaning and shampooing, to speed up the drying process and prevent mold growth.
- Furniture Protection: Place aluminum foil or plastic under furniture legs to prevent stains during the cleaning process.
- Follow Instructions: Carefully follow the instructions for the cleaning machine and solutions to avoid over-wetting the carpet or leaving behind residue.
Each cleaning method has its advantages and is suited for different types of carpets and soiling levels. Choose the method that best fits your carpet type and the degree of cleaning needed, ensuring a fresh and well-maintained carpet.
Step 4: Applying the Cleaning Solution
Apply your chosen cleaning solution evenly, taking care not to saturate the carpet.
Step 5: Scrubbing and Agitating
Gently scrub or agitate the carpet to help the cleaning solution penetrate deeply.
Step 6: Rinsing and Drying
Properly rinsing and drying your carpet after cleaning is crucial to prevent residue buildup and ensure the longevity of the carpet. Here’s how to effectively handle these final steps in the DIY carpet cleaning process.
Rinsing (If Required)
- Need for Rinsing: Rinsing is necessary if the cleaning method used involves a cleaning solution that needs to be removed, like in steam cleaning or shampooing.
- DIY Approach: If your carpet cleaner doesn’t have a built-in rinsing function, you can do it manually. After cleaning, fill the machine with clean water (no cleaning solution) and go over the carpet again. This will help remove any remaining soap residue.
- Tips for Effective Rinsing: Use lukewarm water for rinsing as it helps in removing soap more efficiently. Be careful not to over-wet the carpet.
Drying
- Importance of Drying: Proper drying is essential to prevent mold and mildew growth, as well as to avoid any unpleasant odors. It also restores the feel of the carpet.
- DIY Drying Techniques:
- Air Circulation: Open windows and doors to create a cross breeze. Use fans to circulate air around the room.
- Dehumidifiers: In humid conditions or in the absence of good natural ventilation, use a dehumidifier to speed up the drying process.
- Towel Absorption: For particularly damp areas, lay towels over the wet carpet and press them gently to absorb excess moisture.
- Raised Temperature: If it’s safe to do so, slightly raising the room temperature can help speed up the drying process, as warmer air can hold more moisture.
Post-Drying
- Final Vacuuming: Once the carpet is completely dry, go over it with a vacuum cleaner. This helps to lift the fibers that might have flattened during the cleaning process and removes any remaining debris.
- Carpet Grooming: Use a carpet rake or a brush to groom the fibers, restoring their natural texture and appearance.
Additional Tips
- Avoid Foot Traffic: Keep foot traffic off the carpet until it’s fully dry. This prevents new stains and helps the fibers to dry uniformly.
- Check for Dampness: Periodically check the carpet for any dampness. If it remains wet for too long, it could lead to damage or mold growth.
- Drying Time: The drying time can vary based on the carpet type, thickness, and environmental conditions. It can take anywhere from a few hours to a full day.
Proper rinsing and thorough drying are critical steps in the carpet cleaning process. They not only ensure the removal of cleaning residue but also maintain the carpet’s condition and prevent potential issues like mold growth and lingering odors. By following these tips, you can achieve a clean, fresh, and well-maintained carpet through your DIY efforts.
Keywords: cleaning guide, preparation, vacuuming, cleaning methods, scrubbing, drying
Tips for Maintaining a Clean Carpet
Regular Cleaning Schedules
Establish a regular cleaning schedule to maintain your carpet’s appearance and longevity.
Dealing with Tough Stains: Wine, Coffee, and Pet Accidents
Tackling tough stains like wine, coffee, and pet accidents requires prompt and specific techniques. Here’s how to handle these common yet challenging carpet stains in a DIY manner.
Wine Stains
- Immediate Action: Blot the stain as soon as possible with a clean, absorbent cloth to remove as much wine as possible. Avoid rubbing, as this can spread the stain.
- DIY Cleaning Solution: Mix one tablespoon of dishwashing liquid, one tablespoon of white vinegar, and two cups of warm water.
- Application: Apply the solution to the stain using a clean cloth. Blot gently, working from the outside of the stain inwards.
- Rinsing: After the stain lifts, dab the area with cold water to rinse out the cleaning solution, and blot dry.
Coffee Stains

- Blotting the Excess: Immediately blot up as much of the coffee as you can.
- DIY Solution: Combine one part white vinegar with two parts water and a small amount of gentle, non-bleach detergent.
- Treatment: Apply the mixture to the stain and let it sit for a few minutes. Blot the area with a clean, dry cloth until the stain is removed.
- Final Rinse and Dry: Rinse the area with cold water, blot to remove excess moisture, and allow it to air dry.
Pet Accidents


- Initial Cleanup: If the stain is fresh, start by removing as much of the waste as possible. If it’s urine, blot up as much liquid as you can.
- Enzyme Cleaners: For pet urine, feces, or vomit, use an enzyme-based cleaner, which breaks down the proteins in the waste and helps eliminate odors.
- Application: Apply the enzyme cleaner according to the product instructions. Usually, you’ll need to leave it on the stain for a specified period.
- Blotting and Rinsing: After the treatment, blot the area with a clean cloth and rinse with cold water.
General Tips for Tough Stains
- Test Cleaners First: Always do a spot test in an inconspicuous area to ensure the cleaner won’t damage or discolor your carpet.
- Don’t Overwet the Carpet: Use solutions sparingly to avoid saturating the carpet, which can lead to mold and mildew.
- Use the Right Tools: Use a clean, white cloth or paper towels for blotting. Colored materials can transfer dye to the carpet.
- Patience is Key: Tough stains might require repeated applications. Be patient and avoid the temptation to scrub vigorously.
- Dry Thoroughly: Ensure the carpet dries fully after treating any stain to prevent mold growth and residual odors.
Dealing with tough stains in a DIY manner is all about acting quickly and using the right techniques and solutions. By following these steps, you can effectively tackle challenging stains and keep your carpet looking clean and fresh.
Preventative Measures
Use doormats, enforce a no-shoe policy, and regularly rotate furniture to prevent uneven wear.
Keywords: maintenance tips, cleaning schedule, tough stains, preventative measures
Conclusion
Cleaning your carpet at home can be a straightforward and rewarding process. With the right tools, techniques, and a bit of elbow grease, you can keep your carpets looking fresh and extend their lifespan. Remember, regular maintenance is key to preventing the buildup of dirt and allergens, ensuring a clean, healthy home environment.
Keywords: home carpet cleaning, easy techniques, health benefits, extended carpet life
By following this guide, you’ll be well-equipped to tackle carpet cleaning at home, ensuring a clean, pleasant, and healthy living space for you and your family.